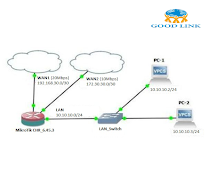
MikroTik 2 WAN load balancing setup with explanation
MikroTik 2 WAN load balancing setup
Sure, here's a step-by-step guide to setting up 2-WAN load balancing on a MikroTik router. This configuration will split traffic across the two WAN connections for better bandwidth utilization and redundancy.
Note: This guide is based on RouterOS version 6.x. Make sure you have access to the MikroTik router's web interface or the Winbox app.
Router access:
Connect to your MikroTik router using a web browser or the Winbox app.
Configure WAN interfaces:
Make sure you have two WAN interfaces (e.g. ether1 and ether2) connected to the router. You must obtain the necessary information from your ISP (IP address, subnet mask, gateway and DNS server).
Set IP address on WAN interface:
Go to “IP” > “Address” and assign IP addresses to both WAN interfaces:
For WAN1 (e.g. ether1): 192.168.1.2/24 (replace with the actual address provided by your ISP)
For WAN2 (e.g. ether2): 192.168.2.2/24 (replace with the actual address provided by your ISP)
Configure default gateways:
Go to “IP” > “Route” and add two default gateways with different distances:
Port 1: Destination 0.0.0.0/0, Port 192.168.1.1, Distance 1, Route Marker (blank)
Port 2: Destination 0.0.0.0/0, Port 192.168.2.1, Distance 2, Route Marker (blank)
These ports will determine the path for outgoing traffic.
Load balancing configuration:
Go to "IP"> "Firewall" and add a mangle rule to mark connections. This rule determines how traffic is balanced between two WAN connections.
Click on the “+” sign
String: pre-routing
Protocols: all
Action: Mark the connection
New connection brand: WAN1
In interface: ether1
Click "OK" to save the rule. Create another mangle rule for the second WAN connection (WAN2):
String: pre-routing
Protocols: all
Action: Mark the connection
New connection brand: WAN2
In interface: ether2
Click "OK" to save the rule.
Create a NAT rule for load balancing:
Go to “IP” > “Firewall” > “NAT” and add a traffic masking rule, allowing for load balancing.
Click on the “+” sign
Channel: srcnat
List of output interfaces: WAN1, WAN2 (this specifies both WAN interfaces)
Action: Masquerade
Click "OK" to save the rule.
Configure queues for load balancing:
Go to "Queues" and add two simple queues to load balance the highlighted connections.
Click on the “+” sign
Target address: 0.0.0.0/0
Packet marker: WAN1 (for first queue) and WAN2 (for second queue)
Parent queue: none
Maximum limit: Set your desired upload and download limits. Click "OK" to save each queue.
Check and monitor:
Test your load balancing configuration by generating traffic from your local network.
Monitor WAN connection status and queues to ensure traffic is evenly distributed.
This configuration will enable load balancing across your two WAN connections. Remember that the actual IP address, interface name, and specific configuration may vary depending on your network configuration and RouterOS version. Always back up your configuration before making any changes, and refer to the MikroTik documentation for all router-specific details.


Comments
Post a Comment